
To do this project you will need the following:
1. Thin Cardboard 8.5x11 (Like a cereal box)
2. Letters printed out on 8.5x11 paper, 700 to 800 pts, any font, up to 2 letters per page
3. Spraymount
4. Exacto knife or blade
5. Glitter (I used Martha Stewart brand)
6. Paint Brush
7. Mod Podge or glue
8. Yarn or thick string
9. Scissors
10. A folder or a folded piece of scratch paper 8.5x11 or larger
11. Masking tape or scotch tape

First you need to spray mount your printed letters to the cardboard. Cut the letters out with scissors once the paper has bonded to the cardboard.
Once you have cut out the letters, you will need to take your exacto knife or razor blade and cut out any extra white paper on the inside of the letter (for example the letter A will still have white space on the inside to cut out)

Once the white space inside the letters are carefully cut out, use your paint brush to coat your entire letter with your glue or Mod Podge. (Finished example below). Only a thin layer of glue will be enough.

Once you have coated the letter with glue, you can sprinkle on the glitter! Remember to put a sheet of folded paper under your letters to catch the excess glitter.


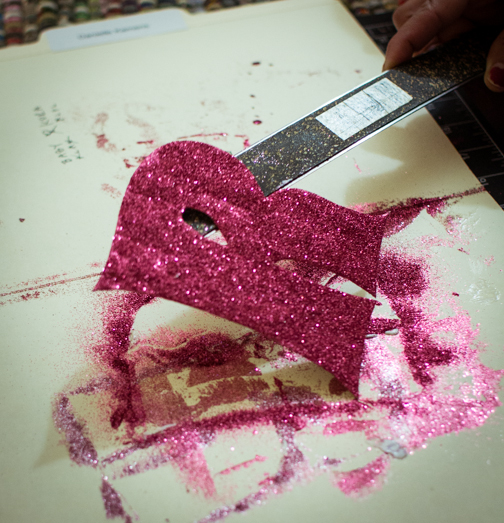
Once the glitter has coated the entire letter, return the excess glitter to it's container for later use.

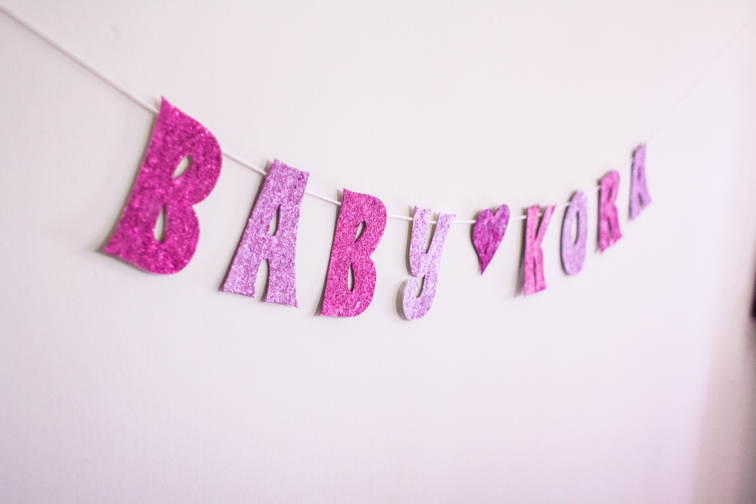
Repeat these steps the desired amount of times to create all of the letters that you will use in your banner. (I did it 9 times for my banner.)
Allow banner letters to dry overnight. The next day, put another coat of Mod Podge on top of the glitter with dabbing motions. If you don't have Mod Podge, be sure to use a glue that dries clear. This helps really well to seal in the glitter so it doesn't come off of the letters. If the letters curl a little, try putting them under a heavy book for an extra night after they have completely dried.

When the letters have dried and are flat as can be, there is nothing more to do than attach the string to the back of them. I literally just eyeballed about a quarter inch down from the top of each letter, and masking taped the string so that the tape was hidden from the front view. I also Mod Podged the string over the masking tape for extra hold. I am sure there is a cleaner way to do this. Maybe clear tape would work better. Or perhaps you can crazy glue pieces of straw to the back of the letters and insert the yarn through there. I'll have to try that next time. Anyway, I would leave about 4 feet of yarn slack on either side for hanging the banner up.
Here's what it looks like done. I'll be using it for my sister's baby shower next week! (hopefully I will have photos to post for that too.)

it looks cool on the table
ReplyDeleteAwesome share! Decorations play a good role in making the occasion memorable. Bridal shower of my colleague was superb. Loved the banners and signage board done at the entrance of event venue with flowers and color theme bunting. Mexican cuisines with platters were ordered. Wine and champagne was also of high quality.
ReplyDelete